Sunday, September 27, 2020

Big News & My Comeback and Tablescape, too!


This old girl, JP, is making a comeback!!! 
I'll be sharing my home decor and inspirational accents, again and starting a brand new venture in creating and sharing more beautiful tablescape designs.
 

I, finally, have a reason to blog again...aside from the love of sharing my inspirations, I will be earning an income by sharing occasional posts promoting a major retail company.
No doubt, the sharing decor ideas will keep on rolling with peeks at more room and vignette photos.

Just a little bit about why I've been away from blogging for so long. My hubby and I decided that we were ready to move south to warmer waters and did so 7 1/2 years ago. With that came my love of the ocean, an addiction to hunting for shells and feeling the heat of the sun on my body. The time spent blogging with no financial reward was too much work for me. I did it all, and if you blog you know what that means! I never did get outside help to promote myself and be able to work less, hence my walking away from this creative outlet.

Some pics of a recent tablescape for fall and my honey's birthday earlier this month.


The fall jug, with a little tweaking, as it sits on our table, now.


I'll be trying to get back into the swing of things, even just getting re-aquainted with my blog and the layout and everything that goes with it is a bit of a challenge. If you are a blogger and have any tips to pass along to me regarding not having to "do it all," please, send me a tip.

Until next week, I'll be fumbling along and having fun going through my pile of inspirations for my next fall tablescape to share with you!

This is how I get started to roll...a bunch of stuff and ya never know!

Real life inspirational chaos!


Maybe's?

Til Next Time...

Love, Hugs & Kisses,

JP

and Gucci, too!


and on 


And a very special thank you to the following sharing post hosts


Friday, December 13, 2019

Red White and Candy Cane Stripes...A Christmas Eve Dress Rehearsal

I'm sharing my "dress rehearsal" of our Christmas Eve tablescape as I like to take my pics and write my blog posts ahead of time to share with you all.
And, as JP always does she manages to find one last little thing to add to her set up after all pics have been done...re: the candy cane touch!

Sadly to say the little candy cane never did make it into my original photo shoot and it would have added the perfect touch. :(

But, "oh well" here we go... on with the show!

I love the messages on our plates.

My year 'round sentiment, perfectly stated.

A, freshly picked, holly sprig added to the place setting card complimented the plates with perfection.


A little chickadee,  atop a mini Christmas tree, co-ordinates with the theme of our mantel and living room tree.


A sweet vintage silver dinner bell is waiting to be rung.


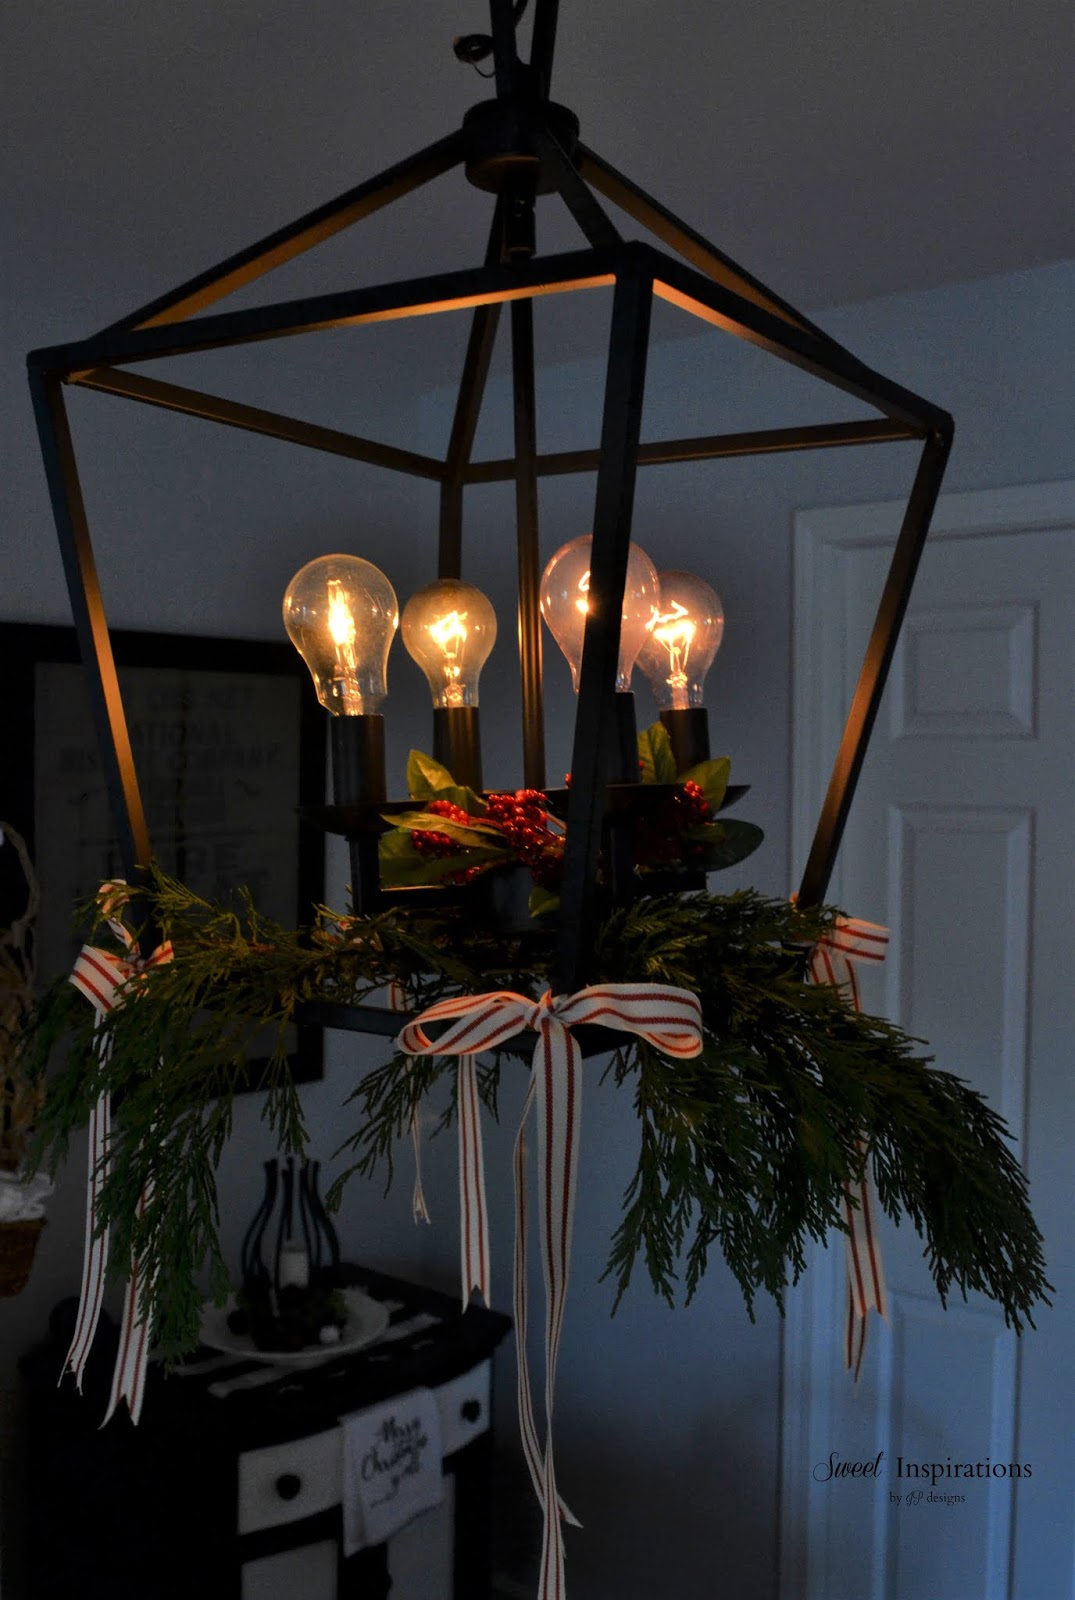
The chandelier has simple touches of fresh yew greens and some grain sack ribbon in red and white. It looks so pretty even at night!

The candlelight centerpiece staged festively aglow.


Gucci, my side kick, watches me intensely almost all the time. 😊

And now, it's "time" for me to go.... I've gotta get working on my next post and show you the rest of our Christmas decorations for this year.


Love, Hugs & Kisses,

JP

and Gucci, too!


I shared this post at the following blogs

Wednesday, November 27, 2019

I'm back with Our German Schmear Fireplace & DIY


My goodness, it's been such a long time since I've created a new post!
 Life is getting shorter, and I'm getting up there in years, I'll be 68 in January. It made me feel the need to get back to posting and adding more to my "memory album." 
 I have four daughters, seven grandchildren and one, new, great granddaughter and want them to all to remember my style and occasional craftiness. Not to forget to, occasionally, inspire others with some of my creations.

Since my last post we have moved from our rental home, of the past 6 years,and into our new "forever home" in Sunset Beach, N.C.
 I've been enjoying, time with the love of my life, family visits, a lot of sunshine at the beach and poolside, friend gatherings and having fun making our little home a bit more updated. We've been doing some upgrades and DIY's, decorating with a lot of our old possessions and have added some new creations, in décor, here and there.

*********************************

Now, for my first post back, I'm sharing the makeover of our brick fireplace and entry that we, finally, just completed. 
(it only took 8 months of procrastinating to get this project done) It's late unveiling was due to my fear of attempting the, very popular, German Schmear technique,which, I can assure you, is waaaay easier to do than you might think!


So,here's a peek at our entry...come on in and take a look.

Everything stands out so-ooo much better on the lighter brick.


and I do mean that EVERYTHING stands out so much better!


This gives you an idea of how much brick there was to complete. Thankfully my hubby helped me do most of the joints, it really helped me a lot!

Here's the way it looked before....very nice brick but, just way to dark for our room.


Now, here's a list of what I used to get the project done.

1- 50 lb. bag of white thinset mortar (slower drying time than reg. mortar) $20 aprox. cost
I used 3/4 of the bag
***note some people use chalk paint in lieu of mortar, but it's way more expensive

painter's tape and plastic to cover areas that you are not "painting"

I used one 4" paint brush and one small stiff chubby brush to get into the joint crevices

plastic painter's bucket

******

I started by mixing, 4, trowel scoops of mortar into my plastic bucket and mixed it with enough water to create a peanut butter like consistency.
I let it sit for about 15 minutes to thicken slightly and then just started "painting" it on in several swipes across each bricks and lightened on the pressure where I wanted more areas of the brick to show through. Start light, you can always go back and add more mortar to cover more of your brick.

I did not do the "sponge off technique" with water. I tried it and it was just too messy, I liked the pressure technique much better!


I/hubby filled in the joint lines first.

You can see the smaller, chubby brush that I used....you may want to have a few on hand as they tend to wear out in no time.


My little buddy Gucci was always by my side!


I'd love to know if this post inspired you :)

'Til Next Time ~ Happy Decorating and Happy Holidays, too!

JP
&
Gucci, too!


I shared this post here

astrollthrulife.net