Thursday, March 3, 2016

Spring is Sprouting in Our Window

Spring fever really hit me hard last week and everything winter and Valentine's day related got put away.
The first to get a re-do was our bay window in the kitchen.  We've been in our house for almost three years and I think that it's seen over a dozen seasonal and holiday looks. 
What a fun spot it is to decorate.

So, here it is this year with an assortment of seedlings, spring cuttings and a few house plants...it's the sunniest part of our house.

And at times the hardest to photograph!


An old toolbox tote is now a perfect container for my zinnia seedlings. I perched it on top of a little stool to add some height and raise it above the other two wooden boxes that are on each side.

Moon flowers were planted first and are already showing some bright green leaves.

Bird votives perch in a few choice places where we can light turn them on and enjoy them in the evening.

No-o-o my zinnia's are not already blooming.....I tried my hand at painting a few like ones that have been shared on Pinterest.

 I left my pine cones whole since I found it really, really hard to cut them.

Zinnia's make such nice long lasting cut flowers. I'm excited to see how many I'll get this summer to fill bottles and jars all around the house.

I added color coded coffee stirrers, to each pot, to easily identify the colors of the plants.

My African violets are back where they are happiest...

with a few basil plants started in between.

Faux spring branches and vinca cuttings, from the yard, fill a jar and give some height on the left. Our neighborhood has some beautiful pear trees that I wanted to cut a few branches from and watch them bloom indoors. I didn't dare risk getting caught!

Soon our yard, in back and out front, will be blooming with amazing azaleas.
It's such a gorgeous sight for a few weeks in April although I see some pink buds already popping way ahead of schedule!

 A hanging vignette holding a few things of spring.


This sentimental plaque has seen many seasons on the outside....this year I brought it in.

I made a centerpiece, in farmhouse style, for our kitchen table.

A pot with basil plantings sits waiting on a stool for some daily sun.
 The chandy got a spring touch to it, too.
 I've got lots more seeds to get started....cosmos, cleome and some lettuce, too!

Here's a little glimpse of what's on our mantel making it look like spring. It's a cute little swag of ribbons, fabric and string!


Love, Hugs and Kisses,
JP

and Gucci, too!


 Sharing this post at these great link parties


lifeonlakeshoredrive
charmbraceletdiva  

rootedinthyme  

staceyembracingchange

astrollthrulife  

dwellings-theheartofyourhome

rustic-refined  

adelightsomelife  

thecharmofhome  

craftsalamode  
frenchcountrycottage  

Monday, February 8, 2016

A Romantic Celebration of Love & Life

I always "Love" to impress my honey for Valentine's Day with a beautiful, romantic tablescape and a delicious dinner that I make for him at home. 
This year is no different as far as trying to impress him....it's just much more sentimental since his recent surgeries after his heart attack and small stroke.
The most important thing in this world is having my soulmate, who loves me like no other, to hold me at night and wake up next to me  for the rest of my life!
This very sentimental love quote is so perfect for us...Chip Gaines, from Fixer Upper, read it to his wife Joanna, for their anniversary on an episode that I recently watched.
I just had to use it!

 I made a cover up to put on the ice bucket.
One for the front


and another, by me, for the back. 
 Here's a peek of this year's romantic tablescape in black, white and red and rose petals, too.

 Layers of textures and patterns make the most eye catching place settings to me. This one began with a black and white checkered table cover...the design that's been making it's way into our kitchen decor. 
A "place mat" of rose petals, in red,and the shape of a heart just speaks of the occasion.
A trio of plates with different designs and heirloom flatware tied with love stamped satin ribbon
 all sit attractively on top.


This is a little look down from above

 and a few views from straight on.

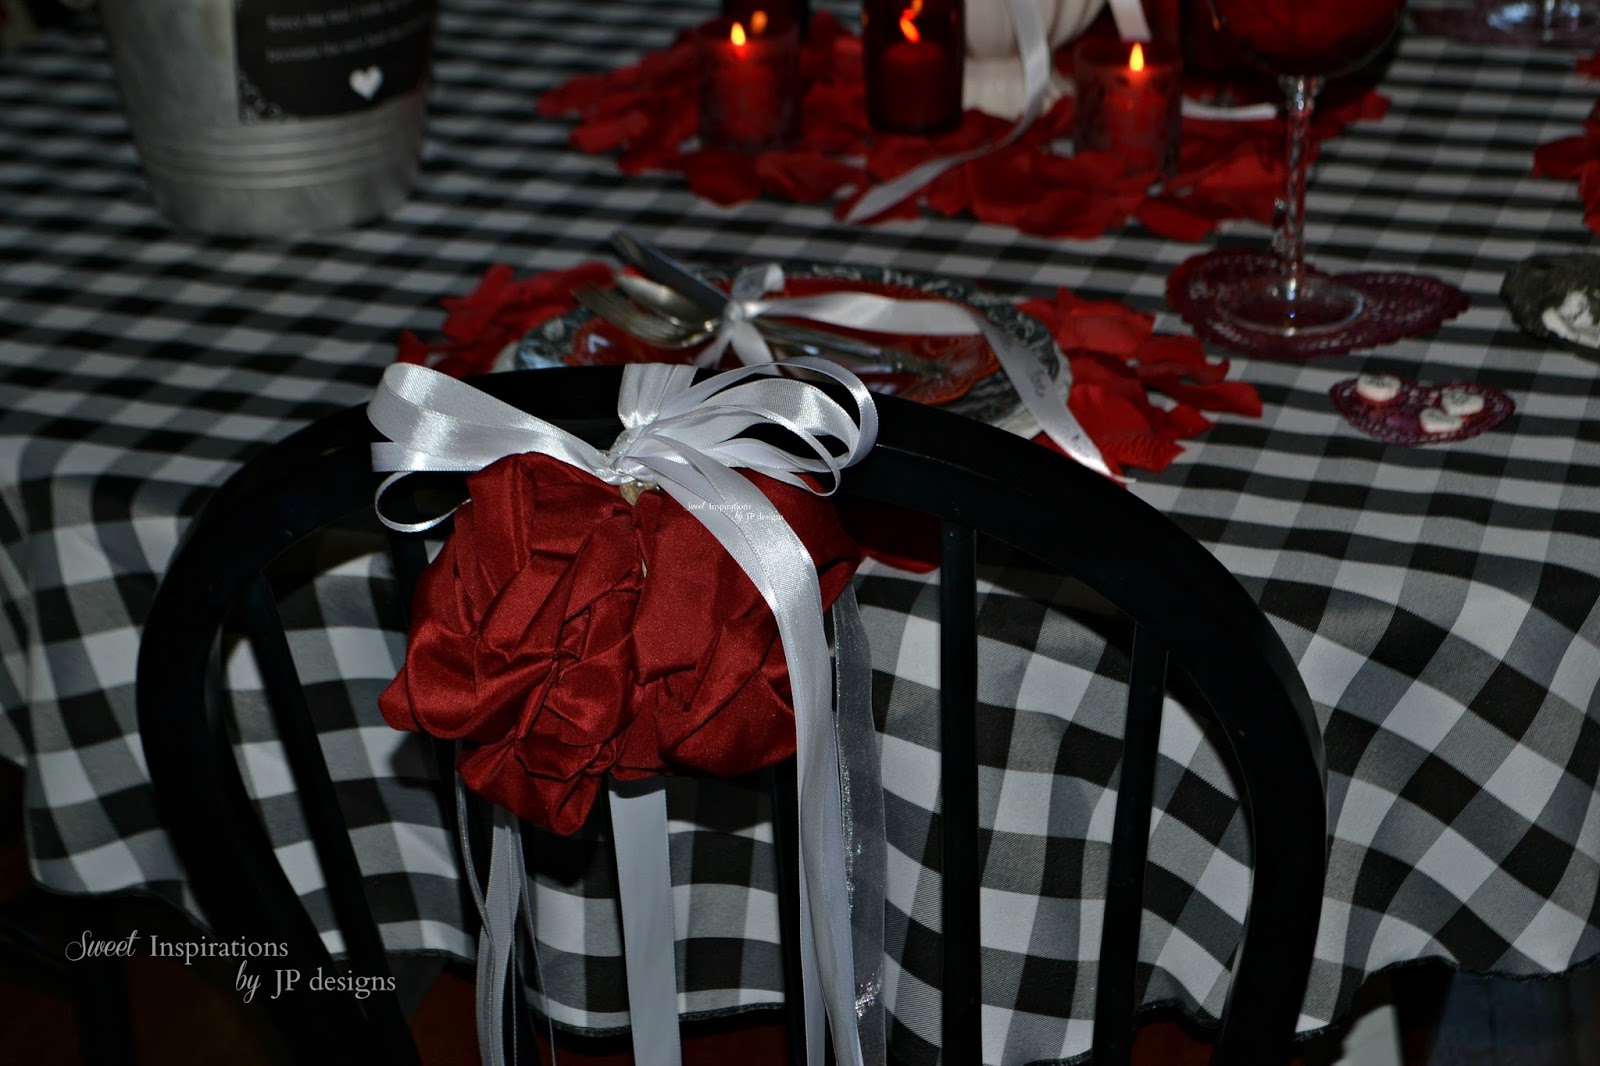
Accents of some kind usually end up on the chairs 
as did these pillow case roses, a satin adorned, version
from last year's evening of romance & love
 
The votive candlescape centerpiece is a sight to behold


especially when lit for the evening's ambiance.

A small ironstone compote holds a red pillar candle with fresh red roses and a white satin ribbon to finish it off.
Conversation hearts, of a non-edible kind, will be waiting to play a fun Valentine love game!
I'm hoping to make some more to add to our selections to get a bit more risque ;) 
It's fun to add occasional fun touches to the chandelier, too

 with more handmade creations
and store bought ones, too.
For more heart inspirations this post, on my first salt dough creations, is here
 
Honey always asks to take me out to some place special....I just always prefer to enjoy things like this and the intimacy of home!
 Wishing you all the most special time celebrating with the love of your life.... I'm off to plan the meal!

Monday, February 1, 2016

A tutorial to make the easiest OLD wooden sign and FREE graphics

onemoretimeevents
I wanted an antique wooden sign for my spring window display and I wanted one right away!
 So, here's my latest tutorial of how, easily, I made this beauty.

The details it has make it look really convincing.

 I'm the type of girl who's just too anxious to get a project done then to go out and waste time hunting for old wood or spending money for some new. 
Cardboard is free and always at hand....I'll show you how to make one.

After cutting a piece, to the size that I want,  I start by painting it a darker shade of brown. It's a better base color for convincing age. So, grab any old craft paint and slap some on!

Then randomly apply a crackle medium, here and there, (not quite all over) and let it dry according to directions.

When it's ready, apply your desired color (making each swipe in one direction) and wait for it to dry. 
I used white semi gloss paint and my, scruffy old, medium paint brush...it's perfect for making chunky gaps in the paint and adds to the aging results!


Here's a little aging technique for any wood project.
 You need to add clusters of tiny worm holes... they are so often found in really old wood.
So, grab a hammer and a nail and poke away!

This is my preferred transfer method:
Design and print out your text or image in REVERSE 
This one is FREE and already reversed and ready for you to use....all that I ask is that a link to my artwork is provided wherever you share your own creations.

Just right click and save it to your downloads.


After you've chosen your text or image this is what you need to do next:
I use presentation paper for more stability with wax paper taped on top and feed it into my ink jet printer.

Remove it very carefully .....it's really easy to smudge!
Then tape it in place to hold it, onto your wood, where you want your image to be.
Again, very carefully, use your finger (it transfers the ink better that using a credit card) and rub over all areas of your design.
Then remove the wax paper and do not touch the ink...it will still be wet on the glossy paint!


Just a little FYI, I accidentally used a semi gloss paint, but, ended up very glad that I did. 
It saved me the hassle of having to hand paint each letter on my sign.
 note: if you happen to have a laser jet printer then simply use a flat paint. The graphics from a laser jet come out much more vivid than the ink jet results, which come out lighter on a flat paint base and you may not have to paint your image at all.

  A moist cotton ball easily cleans up any little imperfections of ink.

 Now to get rid of that glossy look...
handle it very carefully as you apply your sealer. I used a matte finish spray.
It completely toned down the shiny finish.


Last summer I made my first fake sign...it's my most popular post on my blog and on Hometalk to date.
my old wood market sign...not
This was the one that I hand to end up hand painting because of the faint image results over the flat paint finish.
It turned out great, but it was a lot more work.


It's kinda crazy how easy this one was to do and how realistically old it turned out. 

So, here it is displayed above our old country cupboard for now. 
Soon I'll move it to our bay window for it's new spring look.


Stay tuned for a fresh breath of spring air!


Love, Hugs and Kisses,
JP

and Gucci, too!